
Cooking burgers on the stove is an art I’ve come to master over time. After experimenting with various temperatures and timings, I’ve discovered the secret to perfectly cooked burgers every time.
Firstly, the key is to start with quality meat. I prefer a blend of 80% lean meat and 20% fat for that juicy, flavorful burger. Before cooking, I let the patties rest at room temperature for about 10-15 minutes. This small step ensures they cook evenly.
Now, let’s talk about the stove-top method. I heat my skillet (preferably cast iron) over medium-high heat. Once it’s hot, I place the burgers on the skillet without overcrowding. The sizzle as they hit the pan is music to my ears!
For medium-rare burgers, I cook them for about 4 minutes on each side. This timing can vary slightly depending on the thickness of your patties. If you’re aiming for medium, 5 minutes per side works well. For those who prefer their burgers well-done, I recommend 6 minutes on each side.
A crucial tip: resist the urge to press down on the burgers with a spatula. I learned this the hard way! Pressing them releases those precious juices, leading to a drier burger.
After the first flip, I sometimes add cheese to let it melt beautifully over the patty. Once cooked to my liking, I let the burgers rest for a couple of minutes. This resting period allows the juices to redistribute, ensuring each bite is as succulent as the last.
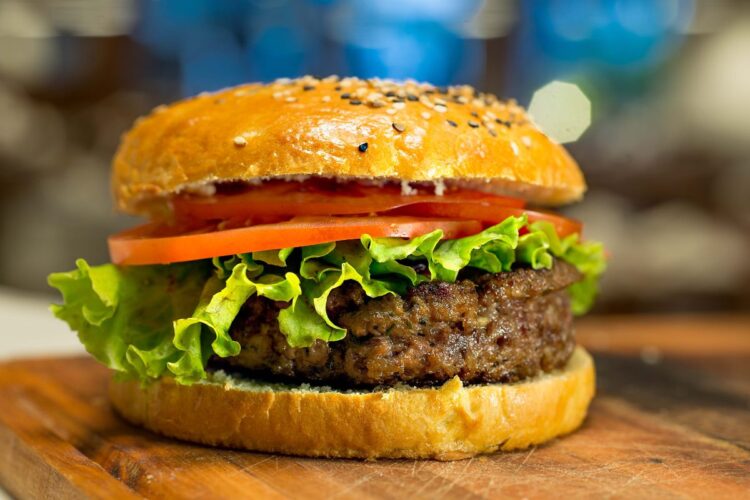
To serve, I go for a lightly toasted bun and my favorite toppings – lettuce, tomato, a slice of red onion, and a dollop of my homemade sauce. The result? A stove-cooked burger that’s consistently delicious, juicy, and full of flavor.
Cooking burgers on the stove might seem straightforward, but it’s the little details that elevate them from good to great. I hope my method inspires you to experiment and find your perfect burger routine!
My Secrets for Seasoning and Topping Stovetop Burgers
As a passionate home cook and food blogger, I’ve always been on the hunt for ways to elevate the humble burger into something extraordinary. After much experimentation and many tasty trials, I’ve discovered that the magic lies in the seasonings and toppings. Here’s how I add layers of flavor to my stovetop burgers.
Seasoning the Patty: The Foundation of Flavor
It all starts with the meat. I prefer a mix of ground chuck and sirloin for the perfect fat-to-lean ratio. But the true game-changer is the seasoning. I keep it simple yet impactful: Kosher salt and freshly ground black pepper. The trick is to season generously right before cooking. This way, the salt doesn’t draw out moisture, ensuring a juicy patty.
Sometimes, I like to add a bit of a twist: a pinch of smoked paprika for a subtle smokiness, a touch of garlic powder for depth, or a sprinkle of dried herbs like thyme or oregano for a herby note. The key is to complement the beef, not overpower it.
Toppings: The Crown of the Burger
The toppings are where I let my creativity shine. Sure, classic lettuce, tomato, and onion are great, but why stop there?
- Cheese Choices: Beyond the usual cheddar or American, I love experimenting with gouda for smokiness, blue cheese for tang, or even brie for creaminess.
- Sauces and Condiments: I make my own aioli or special sauce. Sometimes it’s a spicy mayo, other times a tangy mustard mix. These homemade sauces can transform a burger from good to gourmet.
- Unique Add-ons: Think beyond the box. Caramelized onions add a sweet complexity, while pickled jalapeños offer a zesty kick. Avocado slices lend creaminess, and a fried egg can make it decadently rich.
- Freshness Factor: Don’t underestimate fresh elements. Arugula or spinach can replace lettuce for a peppery bite, and fresh herbs like basil or cilantro can add a burst of freshness.
Bringing It All Together
When assembling the burger, I balance the flavors and textures. A crunchy element, a bit of creaminess, some zing from pickles or sauces, and the umami from the perfectly cooked patty.
In my kitchen, making a burger is like creating a piece of art. Each element plays a crucial role, and the combination of seasonings and toppings is where the magic truly happens. I encourage you, my fellow food enthusiasts, to experiment and find your favorite combinations. Remember, in the world of burgers, the possibilities are endless!
Pairing Your Stovetop Burgers with Ideal Sides: My Go-To Choices
As a dedicated food enthusiast and blogger, I believe that a great burger experience is about more than just the burger itself – it’s about the entire plate. The sides you choose can elevate your stovetop burgers from a simple meal to a culinary delight. Here are my favorite sides to serve with burgers, each adding its own unique flair to the meal.
1. Crispy Sweet Potato Fries
My first go-to is sweet potato fries. Their natural sweetness and rich texture make them a perfect companion to a savory burger. I slice them thin, toss them with olive oil, a touch of cinnamon, and a hint of paprika, and bake until they’re perfectly crispy. Sometimes, I serve them with a side of garlic aioli for dipping, which adds a creamy and garlicky contrast to the sweet fries.
2. Tangy Coleslaw
Coleslaw is a classic for a reason. It adds a refreshing, tangy element to the meal. I prefer to make mine with a vinegar-based dressing rather than mayonnaise, adding a bit of Dijon mustard and honey for complexity. The crunch of the cabbage and the sharpness of the dressing cut through the richness of the burger, creating a balanced bite.
3. Grilled Corn on the Cob
When in season, grilled corn on the cob is a must. I brush the corn with a mixture of melted butter, lime juice, and chili powder, then grill it until it’s slightly charred. The smokiness from the grill and the zesty butter make it an irresistible side that complements the smokiness of a stovetop burger.
4. Classic Caesar Salad
For a lighter side, I often turn to a classic Caesar salad. The crisp romaine lettuce, creamy dressing, and crunchy croutons offer a fresh contrast to the hearty burger. Plus, it’s a great way to add some greens to your meal.
5. Garlic Roasted Vegetables
Roasted vegetables are a fantastic way to add a healthy and flavorful side to your burger feast. I love roasting a mix of zucchini, bell peppers, and red onions with olive oil, garlic, and herbs. They become tender, slightly sweet, and full of flavor, making them a wholesome and colorful addition to the plate.
Pairing the right side with your burger can transform your meal into a complete dining experience. Each of these sides brings its own unique taste and texture, complementing and enhancing the flavors of your stovetop burger. So next time you’re planning a burger night, consider these sides and watch how they bring your meal to the next level!
My Essential Guide to Post-Burger Cooking Cleanup and Maintenance
Cooking a mouth-watering burger is an experience I cherish, but what comes after is equally important – the cleanup and maintenance. Over the years, I’ve honed a routine that ensures my kitchen stays pristine and my tools remain in perfect condition. Here’s my step-by-step guide:
Step 1: Tackle the Skillet and Stovetop First
Once the burgers are off the stove, I start with the skillet. For my cast iron, it’s a scrub with a brush and hot water, no soap needed. Then, it’s dried on low heat and lightly oiled. For other pans, warm soapy water does the trick. Don’t forget to clean the stovetop, especially around the burners, to remove any grease.
Step 2: Clear the Air
Burger cooking can be smoky. I always turn on my range hood, but if you don’t have one, an open window or a fan helps in ventilating the kitchen and keeping it fresh.
Step 3: Wipe Down Counters and Surfaces
Next, I address any splatters on my counters. A mix of warm water and dish soap usually suffices. For tougher stains, I rely on a baking soda paste.
Step 4: Utensils and Cutting Boards
Immediately cleaning any utensils that touched raw meat is crucial for hygiene. Hot soapy water is generally enough, but occasionally I use a bleach solution for thorough sanitizing. My wooden cutting boards get a special treatment with a lemon and salt scrub.
Step 5: Proper Grease Disposal
Never pour grease down the sink! I let it cool and scrape it into the trash. Excess grease goes into an old jar for disposal.
Step 6: Maintaining the Grill Pan
If a grill pan was used, a quick clean while it’s still warm with a grill brush keeps it in top shape.
Implementing this routine after cooking burgers not only keeps my kitchen clean but also ensures the longevity of my cooking tools. It’s a small price to pay for the joy of cooking and savoring delicious burgers!