
Cooking ham can seem daunting, but with the right approach, it turns into a delightful culinary adventure. Let me share with you my journey and tips for cooking the perfect ham, whether it’s cured or uncured.
1. Knowing Your Ham
- Cured vs. Uncured: Cured hams are usually pre-cooked and need reheating, while uncured hams require full cooking.
- Preparation: Allow cured hams to sit at room temperature for 1-2 hours before cooking. For uncured hams, prepare a glaze for flavor.
2. Cooking Time and Temperature
- Cured Ham: Bake in the oven at 325°F (160°C), approximately 10 minutes per pound. Aim for an internal temperature of 140°F (60°C).
- Uncured Ham: Longer cooking at the same temperature, targeting an internal temperature of 145°F (63°C). Estimate 15-20 minutes per pound.
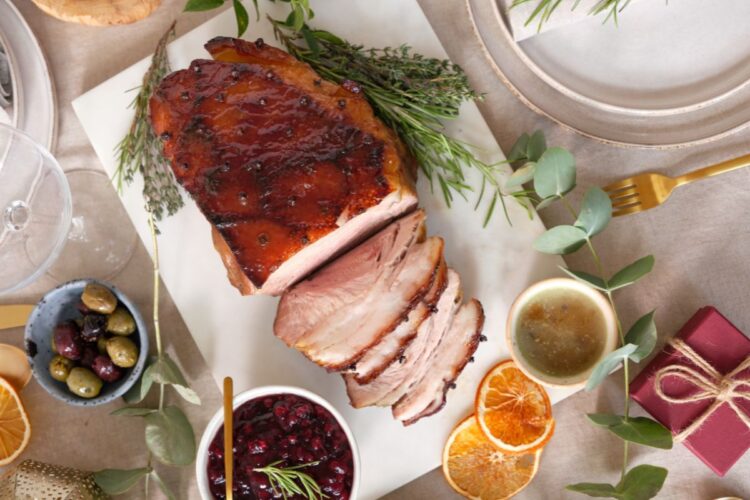
3. The Art of Glazing
- Glaze Recipe: A mix of brown sugar, honey, mustard, and cloves.
- Application: Brush the glaze onto the ham 20 minutes before the end of cooking for a caramelized finish.
4. Resting the Ham
- Importance: Let the ham rest for 10-15 minutes post-cooking for juiciness and flavor distribution.
Mastering ham cooking is about patience and careful attention to details like temperature and timing. Whether it’s a special occasion or a family meal, a well-cooked ham is a delight to serve and enjoy.
A Flavor Adventure: My Creative Spin on Ham Glazes
Hello everyone! Today, I’m taking you on a flavor-packed journey through my kitchen as I experiment with unique glaze recipes to transform ordinary ham into a gourmet delight.
Step-by-Step Guide to Innovative Ham Glazing
1. Crafting the Perfect Glaze
- The Flavor Trio: Start with a sweet base (like honey or maple syrup), add tanginess (mustard or vinegar), and a hint of spice (cinnamon, paprika).
- My Secret Touch: I often add a dash of my favorite spices or herbs for that extra zing.
2. Signature Glaze Recipes
- Bourbon Peach Delight: A mix of bourbon, peach preserves, brown sugar, and ground cloves for a smoky-sweet sensation.
- Fiery Chipotle Pineapple: A daring blend of pineapple juice, chipotle peppers, and honey for a spicy-sweet kick.
3. The Art of Glaze Application
- Timing Is Everything: Begin glazing in the last 30 minutes of cooking.
- Layer for Flavor: Apply the glaze in layers, every 10 minutes, to build a rich, caramelized coating.
4. Unleashing Creativity with Ingredients
- Fruit & Spice Fusion: Experiment with combinations like apricot jam and rosemary, or fig preserves with thyme.
- A Splash of Liquor: Adding rum or whiskey can introduce an exciting depth of flavor.
Glazing ham is not just cooking; it’s an artistic expression of flavors. I encourage you to play with ingredients and create your own signature glaze. Remember, the kitchen is your canvas, and each glaze is a masterpiece waiting to happen. Enjoy the adventure!
My Ultimate Guide to the Best Ham Side Dishes
Introduction Hello food lovers! When it comes to a ham dinner, the sides are as important as the main course. Let me guide you through my top side dish picks that truly complement the flavors of ham.
Quick Glance: My Top 5 Side Dishes for Ham
- Scalloped Potatoes
- Green Bean Almondine
- Roasted Root Vegetables
- Pineapple Casserole
- Cornbread
Dive Deep: The Details of Each Dish
1. Scalloped Potatoes: Creamy and Rich
- Key Flavors: Garlic, Paprika
- Why It’s Great: Balances ham’s saltiness with a creamy texture.
2. Green Bean Almondine: Crisp and Refreshing
- Special Ingredients: Lemon Juice, Toasted Almonds
- Perfect Pairing: Adds a crunchy, fresh texture to the meal.
3. Roasted Root Vegetables: Sweet and Earthy
- Flavor Boosters: Honey, Thyme
- Complements: Natural sweetness balances savory ham.
4. Pineapple Casserole: Sweet and Tangy
- Unique Twist: Cheddar Cheese, Crunchy Topping
- Contrast Play: Offers a delightful contrast to salty ham.
5. Cornbread: Southern Comfort
- Spicy Additions: Jalapeños, Corn Kernels
- Soulful Match: Complements ham with its buttery texture.
Conclusion Each of these side dishes brings something special to the table, enhancing the overall ham dining experience. Remember, the best meals are those made with love and a dash of creativity. Happy cooking and enjoy your ham feast!
Keeping Ham Delicious: My Tips on Storing and Reheating Leftovers
Introduction Hello, fellow foodies! If you’re like me, you hate to see good food go to waste, especially something as delicious as ham. Today, I want to share my personal tips on how to safely store and reheat leftover ham while maintaining its quality and flavor.
Storing Leftover Ham: Safety First
- Refrigeration Is Key: I always ensure to refrigerate leftover ham within two hours of cooking. This helps prevent bacterial growth.
- Airtight Containers: I use airtight containers or heavy-duty aluminum foil to store the ham. This keeps it fresh and prevents it from absorbing other odors in the fridge.
Freezing for Longevity
- Preparation: When I know I won’t consume the ham within a few days, I opt for freezing. I slice the ham into portions and wrap each piece tightly in freezer-safe material.
- Labeling: Don’t forget to label! I always write the date on the package to keep track of how long it’s been stored.
Reheating Without Drying Out
- Low and Slow: To reheat, I prefer using a low temperature, around 275°F (135°C), and covering the ham with foil. This prevents it from drying out.
- Adding Moisture: Sometimes, I add a splash of water, broth, or even apple juice to the ham before covering it. This adds moisture and a subtle flavor.
Microwave Method
- Quick Fix: If I’m in a hurry, I use the microwave. I place the ham in a microwave-safe dish, cover it with a damp paper towel, and heat it on medium power. It’s quick but can unevenly heat the ham, so I keep an eye on it.
Safety Check: Internal Temperature
- Ensuring Safety: The key to safely reheating ham is to reach an internal temperature of 165°F (74°C). I use a meat thermometer to check this.
Conclusion Storing and reheating ham doesn’t have to be daunting. With these simple tips, you can enjoy your delicious ham leftovers safely and just as tasty as the first time. Remember, food safety is crucial, so always err on the side of caution. Bon appétit!
The Secret to Perfect Ham: My Experience with a Meat Thermometer
Introduction Hey there, food lovers! Today, I want to share a game-changing kitchen tool that revolutionized the way I cook ham: the meat thermometer. Gone are the days of guesswork and overcooked meats. Let me guide you through my journey of mastering the perfect ham with the help of this handy gadget.
Why a Meat Thermometer is Essential
- Precision Cooking: I’ve learned that cooking ham to the perfect temperature is key for texture and flavor. The meat thermometer takes away the guesswork, ensuring a juicy and tender result every time.
- Safety Matters: It’s not just about taste – cooking ham to the right temperature is crucial for food safety. The thermometer ensures that the ham reaches a safe internal temperature, eliminating any foodborne illness concerns.
Choosing the Right Meat Thermometer
- Types I’ve Tried: I’ve experimented with several types, from instant-read to leave-in thermometers. My personal favorite is the instant-read digital thermometer for its quick and accurate readings.
- Features to Look For: I recommend finding a thermometer that is easy to read, has a quick response time, and is durable. A good range is also important – it should read at least up to 200°F (93°C).
How I Use It for Ham
- Insertion Technique: I insert the thermometer into the thickest part of the ham, avoiding bone and fat. This gives me the most accurate reading.
- Target Temperature: For a fully cooked ham, I aim for an internal temperature of 140°F (60°C) when reheating. If it’s an uncooked ham, I cook it to 145°F (63°C).
Tips for Best Results
- Avoid Overcooking: I start checking the temperature toward the end of the cooking time to avoid overcooking.
- Resting Time: After reaching the desired temperature, I let the ham rest. This allows the juices to redistribute, making the ham even more succulent.
Conclusion Using a meat thermometer has been a game changer in my kitchen. It’s a simple tool but makes a huge difference in achieving perfectly cooked ham. Whether you’re an experienced chef or a beginner in the kitchen, a meat thermometer is an investment worth making. Happy cooking!