
Today, I want to dive into something that has stood as a culinary challenge for many, including myself, over the years. It’s a staple that finds its way into our meals, a comforting presence that, alas, loses some of its charms when left in the cold embrace of the refrigerator — yes, I’m talking about rice. Whether it’s the remains of a lavish weekend meal or just pre-cooked rice awaiting its turn in the weekly meal prep, reheated rice often loses the initial allure it holds when fresh. So, how do we rekindle the magic? Let’s explore together!
Reheating rice isn’t just a matter of restoring warmth; it’s about reviving its very essence. Rice contains moisture, and this moisture is often lost when the rice is cooled, making it clumpy, dry, or even hard. The key to successful reheating lies in moisture management.
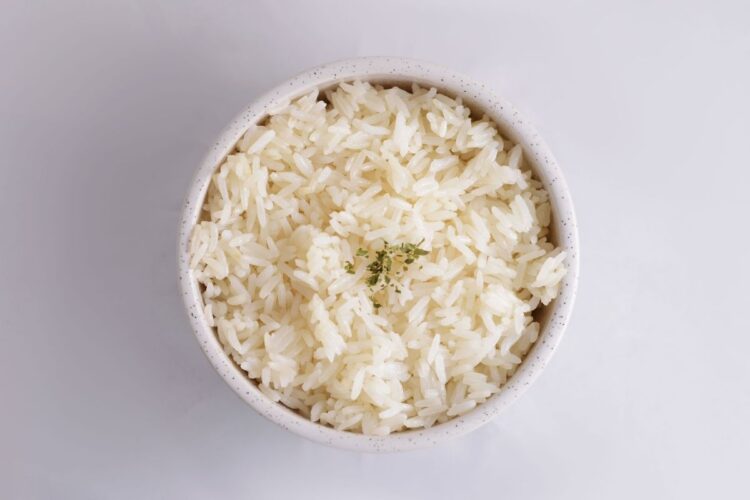
Microwave Method: Quick and Convenient The microwave stands as a hero for the time-conscious. Here’s how I’ve managed to achieve the best results:
- Distribute Rice Evenly: I place the rice in a microwave-safe dish, breaking up any clumps and spreading it out evenly.
- Moisture Magic: This step is crucial! I drizzle a tablespoon or two of water over the rice. For enhanced flavor, broth works wonders too. It’s all about reintroducing the moisture lost during refrigeration.
- Cover for Steam: Using a microwave-safe lid or food-grade plastic wrap, I cover the dish while ensuring there’s a vent for steam to escape.
- Microwave with Care: I usually set the microwave for 2 minutes, then in 30-second bursts if more time is needed. The goal is to warm it thoroughly without making it too dry or soggy.
- Let it Stand: I let the rice stand for a couple of minutes after microwaving. The steam continues to work its magic, distributing moisture and heat throughout.
Stovetop Method: For a Textural Treat Sometimes, I prefer using the stove, especially when dealing with larger quantities of rice.
- Prep Your Pan: I use a non-stick skillet or saucepan with a lid and set it over medium heat, adding just enough oil or butter to coat the bottom lightly.
- Even It Out: Spreading the rice in an even layer and breaking up any clumps ensure uniform texture and heating.
- Water Works: Just like the microwave method, I sprinkle some water or broth over the rice to help steam it, promoting moisture without sogginess.
- Low and Slow: I cover the pan and heat the rice on a low flame, stirring occasionally to prevent sticking. It usually takes about 5 minutes to get it thoroughly warm and restore the texture.
- Rest and Fluff: After turning off the heat, I let the rice sit for a few minutes. Then, using a fork, I gently fluff it to give it that final touch of lightness.
Through these methods, I’ve found joy in restoring life to leftover rice, making it a star, whether as a side or the main dish. The art of reheating rice is really in ensuring it regains its moisture, warmth, and ultimately, its inviting texture.
Remember, the journey of enjoying food doesn’t end at the first serving, but continues into the realm of tasty, safe, and satisfying leftovers.
Until next time, may your culinary explorations be delightful and your rice always fluffy!
Why is it important to properly reheat rice?
In our journey through the vast and intricate world of gastronomy, we often encounter simple elements of our diet that, unbeknownst to many, require careful attention. One such underrated concern is the proper reheating of rice, a staple in numerous global cuisines. Today, I want to share with you why this seemingly mundane task is, in fact, a crucial aspect of food safety and quality, something that I learned through personal experience and meticulous research.
1. Food Safety Concerns: The first time I stumbled upon the importance of reheating rice correctly was when I learned about Bacillus cereus — a sneaky bacterium commonly found in rice, among other foods. This microbe can survive cooking and, if the rice is subsequently stored at room temperature, it multiplies rapidly, producing toxins that can lead to food poisoning. Symptoms can be quite unpleasant and include stomach cramps, diarrhea, and vomiting.
What startled me was that these toxins are heat-resistant; they won’t necessarily be eradicated by reheating. This fact underscored the importance of two things: first, the need to cool the rice quickly and store it at a safe temperature (ideally within an hour after cooking and at below 40°F or 4°C), and second, the need to reheat it thoroughly to kill any bacteria that might have grown after cooking.
2. Nutritional and Sensory Quality: Apart from safety, there’s the issue of quality. Rice, when reheated improperly, loses its sensory appeal. It becomes dry, hard, and unappetizing, as I’ve noticed on several unfortunate occasions. The texture changes because the starch molecules in the rice crystallize, a process known as retrogradation. I discovered that reintroducing moisture and ensuring the rice is steaming hot can help restore its original texture and prevent it from becoming a chewy mess.
Moreover, improperly reheated rice can lose more than its palatability. There’s a decline in its nutritional value due to the nutrient loss that occurs during repeated temperature changes. For someone who values the nourishment my body gets from food, this was a point of concern.
3. Contribution to Food Waste: Learning about these aspects of food safety and quality made me realize the role of proper reheating in reducing food waste. In my own kitchen, I’ve seen how rice that has turned hard, dry, or otherwise unpalatable due to improper reheating methods ended up in the trash. Being more mindful of how I reheat rice has not only made my meals safer and more enjoyable but also helped in my personal commitment to reducing food waste.
In light of these insights, the act of reheating rice took on a new level of significance for me. It’s not just a culinary task, but a health and environmental responsibility. I became more vigilant, following the correct cooling, storing, and reheating procedures, and found that these steps profoundly impacted my overall dining experience.
So, next time you look at that bowl of leftover rice, remember that it’s not just about warming up a side dish. It’s about ensuring each grain contributes to a safe, nutritious, and enjoyable meal. Let’s continue to pursue these small but significant steps in our culinary practices, making every meal a symphony of responsibility, health, and pleasure.
Until our next kitchen adventure, stay curious and eat well!
Can I use a microwave to reheat rice?
Today, let’s delve into a topic that’s been a subject of many kitchen debates and a query that I often receive from readers: “Can I use a microwave to reheat rice?” Whether you’re rushing to put together a quick meal, wanting to enjoy leftovers, or simply craving something warm and comforting, rice is often our go-to. But the question remains, is the microwave a friend or foe in this endeavor?
The answer, I’ve found through both research and personal experience, is a resounding yes, but with a few essential caveats. Here’s the journey I took to understanding the art and science of reheating rice in the microwave.
Understanding the Basics: Firstly, it’s crucial to acknowledge that rice, as benign as it seems, comes with a food safety baggage due to the possible presence of Bacillus cereus, bacteria that thrive in improperly stored rice. The toxins produced by these bacteria can withstand heat, making the reheating process a bit tricky.
The Importance of Immediate Storage: Before we even get to reheating, the first defense against potential food poisoning is how the rice was stored initially. After cooking, I always make it a point to cool the rice quickly (ideally within an hour) and store it in the refrigerator at below 40°F or 4°C. This practice inhibits bacterial growth and ensures that the reheating process—whether in a microwave or otherwise—is off to a safe start.
Enter the Microwave: The microwave, with its convenience and efficiency, can be an excellent tool for reheating rice, provided it’s done correctly. Here’s the method I follow for the best results:
- Portioning and Spacing: I take out the desired portion of rice and spread it evenly in a microwave-safe dish. This even layering is a trick I’ve learned that allows for uniform heating, preventing cold spots where bacteria can survive.
- The Magic of Moisture: To combat dryness and achieve a fluffy texture, I sprinkle a few tablespoons of water over the rice. This step reintroduces lost moisture during the initial cooking and refrigeration processes.
- Covering for Consistency: Using an appropriate cover or microwave-safe plastic wrap with a few holes poked for ventilation, I create an environment for steam build-up. This makeshift steaming process is key to reviving the rice’s texture and warmth.
- Timed Heating: Depending on the microwave’s power, I heat the rice on high for approximately 2 minutes. After this, I carefully check if it’s steaming hot throughout, ensuring that it reaches 165°F or 74°C. If not, I continue heating in 30-second intervals.
- Rest and Fluff: After taking it out of the microwave, I let it stand for a minute, then gently fluff with a fork. This final touch helps in getting back that near-original texture we love in freshly cooked rice.
The Verdict: So, is the microwave suitable for reheating rice? Absolutely. It’s quick, efficient, and, with the right steps, restores the rice to its former glory. However, the journey doesn’t start at reheating; it begins with proper rice storage, a step that shouldn’t be overlooked.
My microwave has become an ally in ensuring that I can enjoy rice safely, with the texture and warmth that comfort food should provide. Whether you’re a student living alone, a busy parent, or someone who values efficiency in the kitchen, understanding and utilizing these steps can turn your microwave from a simple appliance into a gatekeeper of food safety and quality in your culinary space.
Until next time, here’s to warm, safe, and delicious meals that fuel not just our bodies, but also our souls!
How do I reheat rice on the stove?
Today, let’s journey back to a kitchen classic, something that many of us might have forgotten in the age of rapid technology and microwave meals. I want to share the art of reheating rice on the stove, a method I’ve rekindled in my own kitchen. While gadgets and new appliances have their charm and convenience, I’ve discovered that sometimes, the old ways allow us to maintain a connection with our food that modern methods simply can’t replicate.
Venturing back to this traditional approach came with its learning curve, but it was well worth the effort. Here’s how I mastered reheating rice on the stove, ensuring it’s both delicious and safely prepared.
Step 1: Assessing Your Leftover Rice First, I begin by checking my refrigerated rice. Proper rice storage is crucial, and I always ensure it’s cooled and placed in the fridge within an hour of cooking to prevent bacteria growth. Assuming this vital step has been taken care of, I gather the rice I want to reheat and set aside, preparing for the magic to happen.
Step 2: Preparing the Pan I choose a non-stick skillet or saucepan depending on the rice quantity. The key here is to provide enough space for an even, single layer of rice, preventing overcrowding and ensuring uniform heating. I’ve found that this method drastically reduces the chance of cold spots that could harbor harmful bacteria.
Step 3: Adding Moisture Here’s a game-changer – adding water! The fridge leeches moisture from the rice, leaving it dry and unappetizing. I sprinkle just enough water (or sometimes broth for an extra flavor kick) over the rice to rehydrate it, usually a couple of tablespoons, avoiding making it soggy.
Step 4: The Reheating Process Now, onto the actual reheating. I place the pan on the stove, setting it to low or medium-low heat. Patience is crucial here. The gentle, gradual reheating helps restore the rice’s internal moisture, giving it that fresh, fluffy texture we all love. I cover the pan with a tight-fitting lid, allowing the steam to do most of the work. This process usually takes about 5-7 minutes, but I’ve learned to rely more on my senses (touch and sight) to understand when it’s perfectly done.
Step 5: Stirring Occasionally Every couple of minutes, I lift the lid and gently stir the rice, ensuring even heating and preventing sticking or burning. This step also lets me see if I need to add a bit more water, depending on how the texture is evolving.
Step 6: Quality Check Before declaring the process complete, I do a quick quality check. I look for steam coming off the rice, indicating it’s hot enough, and I make sure it’s reached 165°F (74°C) for safety. I also taste a small spoonful to check the texture and warmth.
Step 7: Serving or Incorporating Once I’m satisfied, I turn off the heat and remove the pan from the stove. Sometimes, I serve the rice immediately, or I incorporate it into the dish I’m preparing. Either way, it’s crucial not to leave the hot rice at room temperature for more than an hour to avoid bacteria growth.
And there we have it! I’ve found this method to be a perfect way to reheat rice. It retains the texture, keeps the grains separate, and most importantly, maintains the inherent simplicity and comfort of a warm bowl of rice.
Returning to traditional techniques has, for me, reinforced a deeper connection with the food I prepare and consume. It allows a meditative, respectful interaction with each ingredient, transforming leftovers into something delightful once again.
Until our next culinary escapade, happy cooking, and remember, sometimes tradition holds the secret to perfection!
Can I use a steamer to reheat rice?
Today, I’m excited to dive into a reheating method that might not be the most conventional but has been a revelation in my kitchen adventures: using a steamer to reheat rice. Yes, a steamer! This journey began when I was looking for a way to bring leftover rice back to life, retaining its moisture and fluffiness. After several experiments and a few kitchen mishaps, I discovered that a steamer could be the unsung hero of reviving day-old rice.
So, why choose a steamer, you ask? Let me take you through my process and the delightful discoveries along the way.
Why a Steamer? Firstly, the problem with reheating rice, especially in a microwave or directly in a pan, is the high likelihood of ending up with a texture that’s anything but the original fluffy, soft grains we enjoyed when the rice was freshly cooked. I’ve dealt with my share of dry, hard, or overly sticky reheated rice. That’s where the steamer comes in — it gently reheats the rice, providing moisture, and reducing the chances of overcooking.
The Set-Up: Starting off, I make sure my leftover rice has been properly stored, as safety comes first. It should be cooled quickly and refrigerated (below 40°F or 4°C) within an hour after cooking to minimize bacteria growth. Once I have my rice ready, I set up my steamer. It doesn’t need to be anything fancy — I’ve used both electric steamers and stovetop steamer baskets, and they work wonders.
The Process: Here’s my step-by-step guide based on several trials, errors, and finally, success:
- Water First: I fill the steamer’s base with the right amount of water, careful not to overfill it. The water shouldn’t come up through the holes and shouldn’t touch the bottom of the steamer basket.
- Prepping the Rice: I place my cold or room temperature rice in a heatproof dish. Spreading it out allows for more even reheating. I learned quickly that clumps of cold rice won’t reheat well, so I break any lumps for a uniform layer.
- Steaming: I put the dish with rice into the steamer basket and cover with the lid. The steam does the job of reheating and rehydrating the rice. Depending on the quantity, I’ve found it takes about 10-15 minutes to get perfectly warm, fluffy rice.
- Checking: It’s essential to check the rice to ensure it’s thoroughly heated to a safe temperature (165°F or 74°C). I also taste it to make sure the texture is right. If it’s not hot enough or still a bit dry, I continue steaming for a few more minutes.
- Fluffing and Serving: Once done, I remove the dish from the steamer, fluff the rice gently with a fork to separate the grains and release steam, and voila! It’s ready to be served or used in my next culinary creation.
The Outcome: What I’ve achieved through steaming is nothing short of a rice renaissance. The grains are tender, the moisture is restored, and the warmth is uniform. It’s almost as if the rice was made fresh all over again.
A Moment of Reflection: Using a steamer has not just been about reheating rice. It’s been about understanding the gentle nature of steam and how it can revive without destroying. In this fast-paced world, it reminded me that sometimes, the delicate, slower methods can offer the most rewarding results.
So, to my fellow culinary companions, I leave you with this method to ponder upon, and perhaps, adopt in your kitchen. It’s not about rushing to the finish line, but about enjoying the culinary journey and ensuring each step, even the reheating ones, are taken with care and thoughtfulness.
Until our next kitchen adventure, keep exploring with patience and passion!